
Author: Grade A Cuts

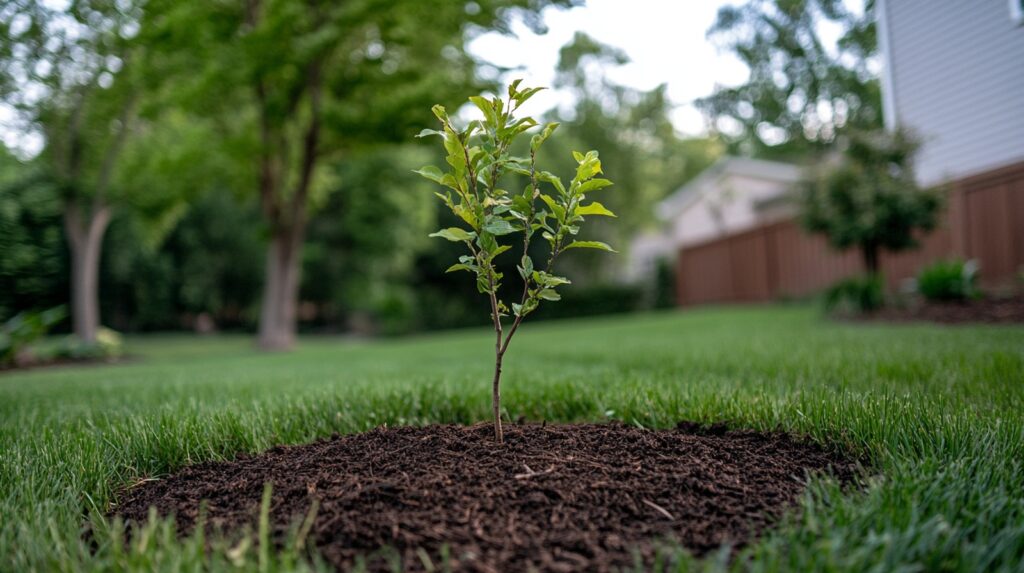
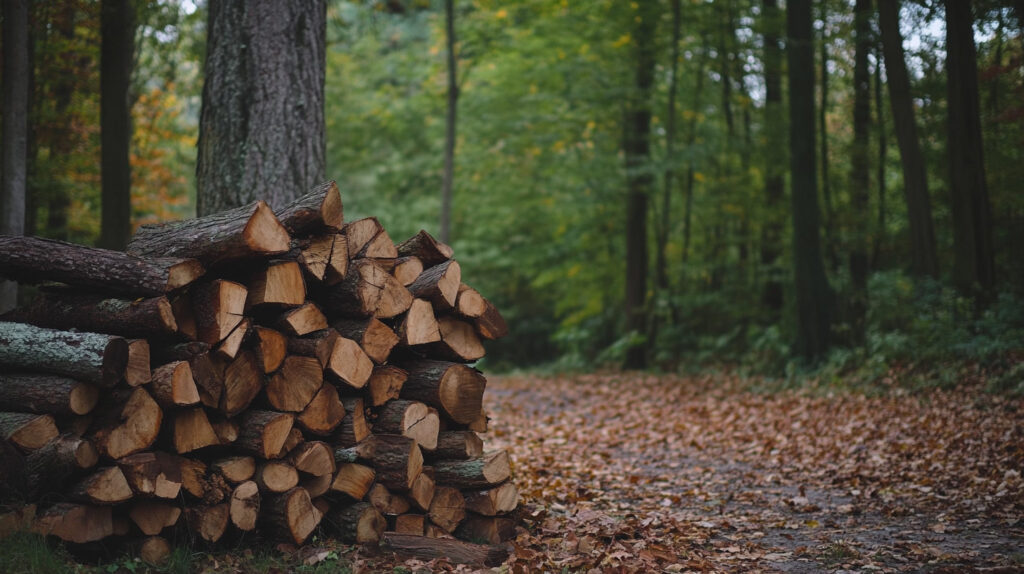
How Much Does Stump Grinding Cost In Virginia?

Got a tree stump in your yard that needs to go? Stump grinding is a great way to get rid of it. 

If you are wondering how much that will cost, this post is for you.

Stump grinding can be a little tricky when it comes to pricing, and the cost can change depending on a few different things—like how big the stump is, where it’s located, and how many you need to grind.

In this post, we’ll break down our prices, and the average prices you can expect to pay. We’ll also go over all the different factors that can affect how much stump grinding cost in Virginia

Our Stump Grinding Prices

We like to keep things straightforward with our pricing. We charge $3.50 per inch of diameter, starting at a minimum of $125. If you’ve got multiple stumps, we’ll give you a discount. We’ll clean up the basic debris too – it’s included. 

Need a bigger job done? We’ll come out and give you a free quote after checking things out. 

We also offer seasonal discounts during our slower months and special rates for senior citizens and military personnel.

Check Out Our Midlothian Stump Grinding Services

Average Cost Of Stump Grinding In Virginia

The cost of stump grinding in Virginia is around $150 – $550. You’ll usually pay between $2 to $5 for each inch of stump diameter when you hire professionals.

Let’s say you have a pretty standard 20-inch stump – that’ll run you about $60 to $140. 

Just keep in mind that most companies set a minimum charge of $100 to $200, even for small stumps.

Factors That Influence Stump Grinding Costs

Stump Grinding Company In Chesterfield Va

Now let’s talk about what goes into the cost of grinding a stump. There’s actually quite a bit to consider, and knowing these factors helps you understand exactly what you’re paying for:

#1 Size And Diameter Of Stump

The size of the stump is the biggest factor that will affect the cost of grinding. 

The larger the stump, the more time, equipment, and effort it takes to grind it down.

  • Small Stumps (around 12 inches or less) – These are the least expensive to grind, usually falling in the $150 to $250 range.
  • Medium Stumps (12-24 inches) – Typically priced between $250 and $350.
  • Large Stumps (24+ inches) – Can range from $350 to $500, or more, depending on how large the stump is.

The diameter isn’t the only thing that matters—the height of the stump above ground also matters. Taller stumps require more grinding time and material removal.

For example, a 30-inch diameter oak stump that’s 12 inches above ground will cost more than one that’s cut closer to ground level.

#2 Number Of Stumps

Another factor to consider is how many stumps you’re having ground. The more stumps there are, the more your total cost would be.

However, the more stumps there are, the less you’ll pay per stump.

Makes sense, right? Once the equipment is there, it’s easier to just keep going.

You should be able to get discounts of 10-15% on the extras. For example, instead of paying $250 per stump for 1, you might get 3 stumps ground for $200 each.

For bigger properties where there are lots of stumps to remove, tree services often put together special package deals. 

Also Read:  Why Should I Hire A Professional Tree Service?

#3 Stump Condition

The condition of your stump matters more than you might realize. 

A stump that’s old, decayed, or rotting is much easier to grind than one that’s fresh and solid. 

A fresh stump can be more difficult to remove, so it requires more time, effort, and specialized equipment. 

Fresh Stumps will cost more and decayed or rotting stumps will lower your price.

Things like weather damage, bugs, and tree diseases can make the job more complicated too. Sometimes you’ll look at a stump and think it’s no big deal, but then you find out it has this crazy root system underground that takes extra time to handle properly.

All these will be factored in.

#4 Tree Species

Virginia has all kinds of different trees, and that actually affects the cost of grinding them. 

Oak and hickory stumps are pretty tough to grind – they’re going to take longer than softer woods like pine or cedar. Those harder woods can bump up the price by 15-25% because they take longer to grind and they’re harder on the equipment. 

Virginia’s native trees like White Oak and Yellow Poplar are usually on the tougher side, while those Bradford Pear trees you see in lots of yards are usually easier to deal with.

#5 Accessibility

How easy it is to get to the stump(s) can have a big impact on the overall price.

A stump that’s right out in the open? No problem. But one that’s squeezed between buildings or hard to get to —like those in a backyard with narrow gates or near structures—will take more time to reach and will likely cost more to grind.

The price might go up 25-50% if it’s in a tough spot. 

But for stumps that are in easy-to-reach areas, expect to pay the standard rates.

Tree services deal with all sorts of challenging spots, from tiny city yards to steep hillsides, and they’ll let you know upfront if there might be any issues.

Also Read: How To Trim A Pine Tree That Is Too Tall

#6 Permits

Most of the time, you won’t need any permits to remove a stump in Virginia if it’s just a regular home job. But some areas want paperwork for bigger jobs or if you’re in a protected area.

Different parts of Virginia handle this differently – Fairfax County tends to have more rules than the rural areas. 

The tree service can handle getting permits if you need them, but you’ll need to cover those permit fees, so it’s something to keep in mind.

They usually know what each area requires and can help you figure out what you need.

#7 Debris Removal And Site Restoration

Grinding a stump creates a lot of wood chips – more than you might expect. 

Basic cleanup comes with the service, but if you want everything completely cleared away and the area fixed up with soil and grass seed, that’s extra – usually between $50 and $100 more.

If you want the site to be restored—meaning the hole is filled in with good topsoil, the area leveled, or grass seeded—there may be an additional cost involved as well.

They can even help you think about what you might want to do with that space in the future.

#8 Location

Your location in Virginia can have a slight effect on the price too.

In larger urban areas or counties with a higher cost of living, like Northern Virginia (Fairfax, Arlington, Alexandria), stump grinding services may cost more due to higher labor rates and overhead expenses.

On the other hand, stump grinding in more rural areas, like Southwest Virginia, might come at a lower cost due to fewer operating costs and lower demand.

For example, the cost of stump grinding in Richmond is different from Midlothian.

Can You Grind A Stump Yourself?

A Stump Grinding Machine In A Field Used By A Tree Stump Removal Company For Tree Stump Removal Services


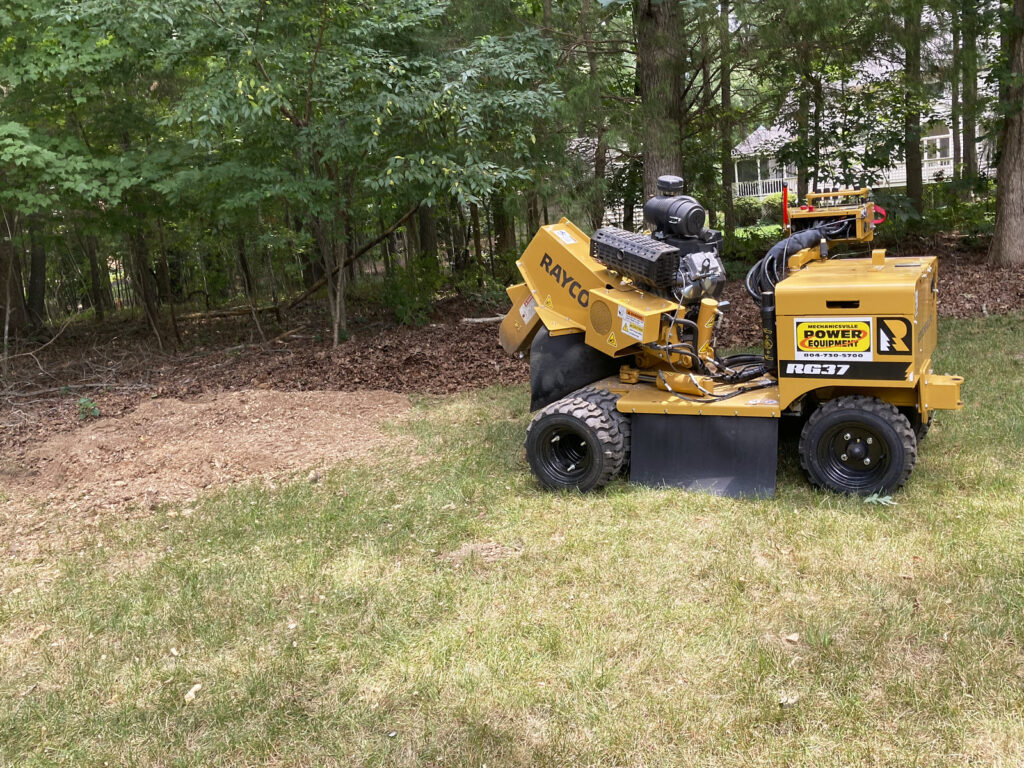
Technically, yes—you can grind a stump yourself. 

You can rent a stump grinder and try to do it yourself. It costs about $100-$200 per day to rent one, not counting transportation. 

But here’s the thing – these machines are powerful and can be dangerous if you’re not used to them. Plus, rental machines aren’t as strong as professional equipment, so the job might take longer and might not turn out as well. 

You’ll also need to consider safety gear, proper insurance coverage, and whether your vehicle can transport the equipment.

For most people, hiring professionals makes more sense. 

We know what we’re doing, we’re insured, and we guarantee our work. It saves you time, keeps you safe, and gets the job done right the first time. 

Plus, we bring commercial-grade equipment that can handle any size job efficiently, and we know how to deal with unexpected challenges that might come!

Bottom Line

Stump grinding costs around $150 – $550 in Virginia. 

The exact cost can vary depending on the size of the stump, how many stumps you need removed, the accessibility of the area, and a few other factors.

If you’re not up for grinding the stump yourself, hiring a professional is usually the easiest and safest way to go.

Be sure to get a few quotes, and ask about debris removal!

FAQs

Is It Cheaper To Grind Or Remove A Stump?

Yes, stump grinding is usually cheaper since it’s less labor-intensive and doesn’t involve removing the roots underground.

Is Stump Grinding Expensive?

Stump grinding isn’t too expensive, but costs can vary depending on the size, number of 

stumps, and how hard they are to reach.

How Much Does It Cost To Grind A 12-Inch Stump?

Grinding a 12-inch stump costs around $40 to $75, depending on the contractor, your location, and how easy it is to access.


Why Should I Hire A Professional Tree Service?

Thinking about taking care of some tree work around your property?

You might be wondering if it’s worth hiring a professional tree service.

While it might seem like a simple task, working with trees—especially large ones—can be trickier and riskier than it appears.

In this post, we’ll go over the top reasons why hiring a professional tree service is often the best move for your trees, your property and peace of mind.

#1 Knowledge And Expertise

Professional arborists know trees inside and out. 

They’ve spent years learning about different tree species and working with them every day. When they look at your trees, they see things most of us would miss completely.

These experts understand exactly how trees grow, what makes them sick, and the right way to trim each type.

They can spot problems early – like diseases starting to develop, bugs moving in, or branches that might become unstable. 

And when they find issues, they know exactly what to do about them.

The best part? They’re not just thinking about how your trees look today – they’re planning for how their work will affect your trees years down the road.

Also Check Out Our Tree Removal Service

#2 They Ensure Safety

Professional Tree Service Young Male Climbing Tree For Training Resized

Let’s be honest – tree work can be dangerous. You’re dealing with heavy branches, sharp tools, and heights. 

It’s not just about climbing up a ladder with a chainsaw (which is scary enough on its own). Professional tree services know all the safety rules and follow them carefully.

They’ve learned the right way to climb trees, use safety equipment, and work around tricky situations like power lines. They’ve seen what can go wrong and know how to prevent accidents before they happen. 

This knowledge comes from years of hands-on experience – the kind you can’t get from watching online videos.

#3 They Prevent Damage To Your Property

When you’re removing branches or taking down trees, you need to know exactly how they’ll fall. Professional tree services understand this completely. 

They have special equipment to lower heavy branches safely, especially in tight spaces where one wrong move could cause serious damage.

They pay attention to everything around your trees – your flower beds, sprinkler systems, and anything else that could get damaged. 

They’re experts at protecting your property and your neighbor’s property too.

Also Read – Tree Bark Looks Burnt

#4 They Carry Liability Insurance 

When you hire a professional tree service, you’re also getting the protection of their insurance policies. 

This is a bigger deal than most people realize.

Professional services maintain comprehensive insurance that protects both you and them. 

Their liability insurance kicks in if anything happens to your property during the work – whether it’s a branch falling on your roof or accidental damage to your landscape. 

They also carry workers’ compensation insurance, which means you’re not responsible if someone gets injured while working on your trees.

#5 They Save You Time And Effort

Tree work isn’t just dangerous—it’s exhausting! Cutting down a tree or trimming branches requires a lot of time and physical labor.

You need to figure out the right approach, gather equipment, do the actual work, and then deal with the cleanup.

It can easily eat up multiple weekends of your time!

Professional crews, on the other hand, make quick work of even big jobs. They arrive with everything they need and a clear plan of action.

What might take you several days to complete, they can often finish in just a few hours.

#6 They Have The Tools And Equipment

Have you ever tried cutting down a large tree with just a chainsaw or a regular ladder? 

It can be tough, and honestly, you might not even have the right tools for the job. 

Professionals come equipped with all the right gear to get the job done safely and efficiently. 

From bucket trucks that can reach high branches to specialized saws and chippers to handle debris, they’ve got the equipment needed to deal with any tree problem. 

Also Read – Topping Pine Trees

Instead of investing in expensive tools or trying to make do with what you have, you get the job done properly with the right tools in hand.

#7 They Clean Up Thoroughly

Professional Tree Service Lumberjack Working With Chainsaw In Forest Resized

One of the biggest headaches with tree work is dealing with the aftermath. 

When you’re done cutting branches, you’re left with piles of wood, mountains of leaves, and sawdust everywhere. 

Professional services make this part completely stress-free because they handle all the cleanup. Their cleanup process is thorough and efficient. 

They bring along equipment specifically for dealing with debris – things like wood chippers, commercial vacuums, and special tarps to catch sawdust and leaves. 

By the time they leave your property, you won’t even be able to tell they were there – except for your perfectly maintained trees.

#8 They Follow Local Regulations

Tree work comes with a surprising amount of rules and regulations

Many cities have specific requirements about which trees you can remove, when you can do the work, and how it needs to be done. 

Professional tree services stay up to date on all these local requirements. 

They know exactly which permits you need and how to get them. They understand which trees are protected in your area and what special procedures might be required.

This knowledge saves you from accidentally breaking local ordinances or facing fines. 

You don’t have to spend time researching regulations or filling out paperwork – your tree service handles all of that.

#9 Peace Of Mind

At the end of the day, hiring a professional tree service gives you peace of mind. 

You won’t have to worry about whether you’re making the right cuts or if that branch might fall on your roof. They can handle any unexpected situations that might come up.

They’re also there to answer your questions even after the job is done. 

If you’re concerned about how a tree is healing after pruning, or if you notice something that doesn’t look quite right, you can give them a call. Many companies will come back to check on their work and make sure everything is growing properly.

Bottom Line

Getting a professional tree service is a smart way to protect your property and keep it looking good.

Yes, professionals might cost more upfront than doing it yourself, but they’re worth it because of their expertise, efficiency, and ability to handle risks.

When you combine their proper equipment, insurance coverage, and professional knowledge, it makes perfect sense to hire them to take care of your trees.

Remember that healthy trees make your property worth more, and getting professional care helps protect that investment.

FAQs

Can’t I Just Take Care Of My Trees Myself?

You could, but tree work can be dangerous if you’re not experienced. A pro knows how to safely prune, remove trees, and take care of things that could be risky, like falling branches.

How Do I Know If I Need A Professional For My Trees?

If your tree’s really big, close to power lines, or has serious damage, it’s a good idea to call a professional. They’ll make sure everything is handled the right way without any stress.

How Much Does Hiring A Professional Tree Service Cost?

The cost can vary depending on the job—whether it’s tree removal, trimming, or stump grinding—but it’s usually worth the investment for the safety and quality of the work. 

It’s best to get a quote based on your specific needs.

Tree Bark Looks Burnt?

Ever noticed your tree’s bark looking like it’s been through a fire, even when you know it hasn’t? 

Don’t worry, you’re not seeing things. There are actually a bunch of reasons why tree bark looks burnt, and it’s not always as bad as it seems.

In this post, I’ll go over the 3 main reasons why your tree bark is turning black and what to do. 

Sunburn Or Sunscald

First up, we’ve got sunburn. Yep, trees can get sunburned too! 

This usually happens when trees suddenly get exposed to a lot of sunlight. Maybe you went a bit overboard with pruning, or there were some big changes in the area around the tree. 

The tree’s sensitive inner layer (the cambium) can get damaged by too much heat, making it look all scorched.

This is pretty common in trees that have just been pruned or been dealing with some crazy weather.

Also Read: Can You Cut One Trunk of a River Birch?

Fungal Infections

Tree Branch With Black Fungal Growth And Diseased Leaves Tree Disease Identification
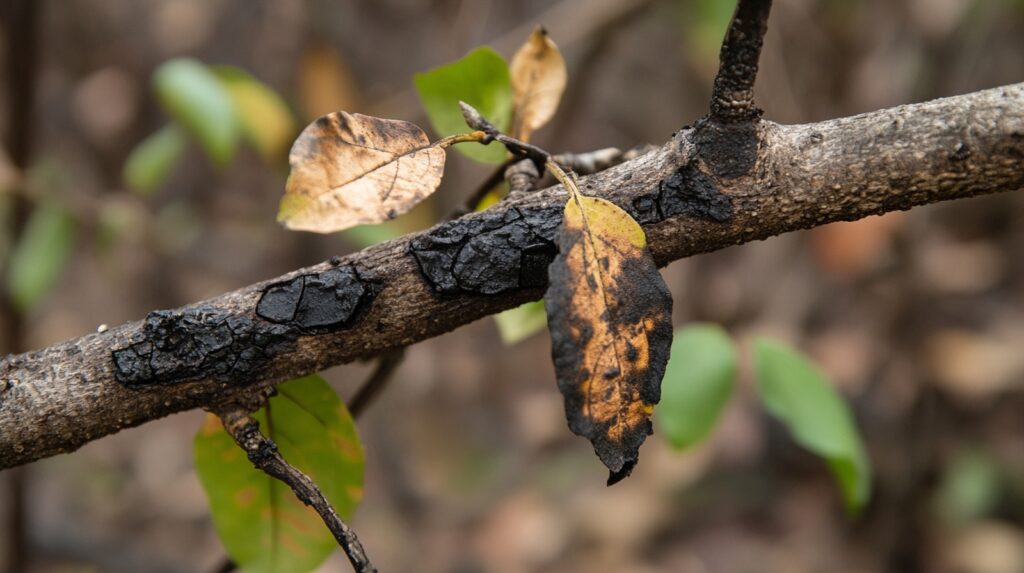
Next on the list are fungal infections. There are a few types that can make tree bark look burnt:

  • Verticillium wilt
  • Steganosporium Ovatum
  • Root rot
  • Sooty mold
  • Fungal cankers

One of the most common ones is Verticillium wilt, which really likes to pick on maple trees.

This fungus lives in the soil and gets into the tree through its roots. It then spreads through the tree’s water transport system.

As it grows, it blocks water and nutrients from moving around, causing branches to wilt and die. The bark might develop dark streaks or patches, giving it that burnt look. 

 If you see leaves wilting and branches dying off too, that’s a big clue.

Bacterial Infections

Bacteria can also make tree barks look burnt. 

For example, there’s a condition called fire blight. It’s caused by a bacteria (named Erwinia amylovora) and it loves to attack apple trees and their relatives. 

Also Read: Can You Top A Holly Tree?

It leaves black marks on the bark and can spread to leaves and fruits too. 

You might even see some sticky liquid and small bumps on the bark – these are signs the infection is getting worse.

The infection can spread quickly, especially when it’s warm and wet, and it can kill the whole tree if you don’t treat it.

What To Do If Tree Bark Looks Burnt?

Young Tree Planting With Fresh Mulch In Residential Lawn Tree Service

So, your tree bark looks black. What’s the next step? Here’s what you should:

#1 Identify The Cause

First, you need to figure out what’s going on. Take a close look at the affected areas. 

Pay attention to where the discoloration is – if it’s mostly on one side of the tree, it might be sunscald. If it’s all over, it could be an infection. 

Check the leaves and branches too. Are they wilting or dying? 

For fungal infections, look for mushrooms or shelf-like growths on the trunk or roots. If you think it might be fire blight, look for young branches that are bent over at the tip, like a shepherd’s crook.

If you’re not sure, try taking some clear, close-up photos of the problem areas. You can show these to someone at a local garden center or call your local extension office for help.

#2 Apply Treatments Depending On The Issue

Once you know what’s causing the problem, you can start treating it. 

Sunburns

If it’s sunscald, you can protect the tree by wrapping the trunk with light-colored tree wrap or painting it with white latex paint mixed with some water. 

This helps reflect sunlight and keeps the trunk cooler.

But don’t do that for areas that are damaged already. Do this instead.

It’s also a good idea to gradually trim the tree over time so it can get used to more sun.

Fungal Infections

For fungal infections like Verticillium wilt or Steganosporium Ovatum, there’s no real cure.

But you can help manage it. Cut off any dead or dying branches, and make sure to clean your tools with rubbing alcohol between cuts. 

Try to keep the tree healthy by giving it enough water and fertilizer. 

Sometimes, tree experts can inject fungicides into the tree, but that’s not something you should try on your own. 

Bacterial Infections

For bacterial infections like fire blight, cut off infected branches, making your cuts at least 12 inches below where you see damage. 

Again, clean your tools between cuts.

In bad cases, you might need to use antibiotic sprays, but these have to be applied at specific times and often need a professional to do it right.

#3 Monitor For Signs Of Stress

After you’ve done the treatments, keep a close eye on your tree. Look for new growth, changes in the leaves, and how the bark’s looking. 

Taking better care of your tree can help it recover and prevent future problems. 

Make sure it’s getting enough water, especially when it’s dry out. Put some mulch around it to keep moisture in and help control the soil temperature. 

And don’t forget about the soil – keeping it healthy can make a big difference.

Also Read: Hardest Wood To Split By Hand

When To Call An Arborist

Close Up Of Tree Branch With Disease Signs In Need Of Tree Health Care

If your tree’s not getting better even after you’ve tried to help, or if you’re just not sure what’s going on, it might be time to call in an arborist.

These tree experts can give your tree a thorough check-up, figure out exactly what’s wrong, and suggest treatments. They know many techniques that most of us don’t

Getting their help early on could be the difference between saving your tree and losing it.

Topping Pine Trees (Don’t – Trim Instead)

Got a towering pine tree in your yard that’s getting a little out of control? 

Before you grab the saw and start chopping off the top, read this post!

Topping pine trees might seem like a quick way to manage their height, but it actually does more harm than good.

In this post, we’ll break down why cutting the top of a pine tree is a bad idea and how to safely trim your pine tree without ruining its health or shape.

Can You Top A Pine Tree?

Technically, you can top a pine tree, but it’s NOT recommended.

Topping cuts off the main part or trunk of the tree, leaving it without its natural growing point, which messes up its growth and causes a ton of other problems.

Also Read: Topping holly trees

Here are the main reasons why cutting the top off your pine tree is not a good idea:

Invites Decay, Disease, And Pests

Topping pine trees leaves big, open wounds on the tree that take forever to heal.

This is like rolling out the red carpet for all sorts of nasty stuff like rot, pests, bacteria, and fungi. The tree can’t defend itself well, and before you know it, you’ve got a sick pine on your hands.

Those big cuts are perfect entry points for fungi and bacteria, and a stressed-out tree is like a beacon for pests.

Over time, all of this can seriously hurt the tree’s health and even kill it.

Creates Weak, Breakable Branches

After topping, the pine tree tries to bounce back by growing new branches super fast. 

We call these “water sprouts.” The problem is, these quick-growing branches aren’t very strong, which means they can easily snap off in a storm or high winds. 

This can be dangerous for anything (or anyone) underneath.

Plus, every time a branch breaks, it creates another wound on the tree, bringing us back to the problem of decay and disease.

Ruins The Tree’s Shape

A topped pine just doesn’t look good. You lose that classic Christmas tree shape that makes pines so pretty. Instead, you end up with an odd-looking tree that looks flat-topped or bushy, nothing like the elegant shape it once had.

Also Read: tree bark looks burnt

This doesn’t just look bad; it can actually lower the value of your property. 

Trees are a big part of a home’s curb appeal, and a misshaped pine can stick out like a sore thumb, making your whole yard look less attractive.

Stunts Long-Term Growth

When you cut off the top of a pine tree, you’re removing what we call the “leader” (that’s the main trunk that grows straight up). 

Most pine trees can’t regrow a new leader once it’s gone. Instead, the tree puts its energy into growing outward rather than upward.

This can make the tree look bushier, but it will never regain its natural, upward-reaching form.

In the long run, the tree becomes more of a liability than an asset to your yard.

What Can You Do Instead Of Topping Pine Trees

Close Up Of Pine Tree Needles On Forest Floor

Don’t worry, there are better ways to take care of a pine tree that’s gotten too tall. 

You can either trim or prune the pine tree. We recommend trimming it.

Trimming is a much better option than topping. With trimming, you can manage the height and shape of the tree without causing any damage.

How To Trim A Pine Tree That Is Too Tall

If you really need to make your pine tree shorter, here’s how to trim it the right way:

Gather Your Tools

First things first, make sure you have the right gear. You’ll need:

  • Pruning shears for the small branches
  • Loppers for branches thicker than your thumb
  • A hand saw for the big guys (branches over 1.5 inches thick)
  • Safety stuff like gloves and goggles

Make sure everything’s clean and sharp. For really tall trees, you might need a sturdy ladder or might want to call in a pro who has the right equipment to reach high branches safely.

Inspect The Tree

Before you start trimming, take a good look at the tree. 

Check for any dead or damaged branches—those are your first priority. Also, look for branches that are too close together or crossing over each other.

After that, plan how you are going to trim it and still keep its natural shape.

Start With Smaller Branches

Begin by cutting smaller branches that are low on the tree or close to the trunk. Remove any deadwood or damaged branches first.

This clears out the bottom of the tree and lets you work your way up. It also helps air move through the tree better and lets more light reach the inner branches.

Also Read: Hardest wood to split

Step back every now and then to make sure you’re keeping the tree looking balanced.

Cutting Larger Branches

For the big branches, use a three-cut technique. It sounds fancy, but it’s just to make sure you don’t tear the bark. Here’s how:

  1. Make a small cut on the bottom of the branch about 12 inches from the trunk
  2. Cut from the top down, finishing at your first cut
  3. Make the final cut close to the trunk, just outside the branch collar (that swollen area where the branch meets the trunk)

This method keeps everything clean and minimizes damage to your tree

Make Clean Cuts And Maintain Natural Shape

Always make clean cuts at a slight angle just outside where the branch meets the trunk. This helps the tree heal faster and keeps diseases away. 

And don’t leave little branch stumps sticking out – they can let diseases get into the tree.

Also try to keep that natural triangle shape as you trim.

Avoid Over-Pruning

It’s easy to get carried away, but try not to overdo it.

Over-pruning can shock the tree and cause stress. A good rule of thumb is to remove no more than 20-30% of the tree’s branches in a single trimming session. 

Over-pruning can cause weak, uneven growth and can make trees more susceptible to disease.

Bottom Line

Close Up Of Pine Tree Bark

Topping a pine tree may seem like an easy fix, but it can lead to bigger problems down the road. 

Instead, trimming your pine tree is a much better way to manage its height and also keep your tree healthy and looking its best. 

Stick to proper pruning techniques, and your pine tree will thrive for years to come.

FAQs

Can Topping A Pine Tree Kill It

Yes, topping a pine tree might kill it. Topping disrupts the tree’s natural growth and can stress it to the point of death.

Can Trimming A Pine Tree Kill It

No, trimming won’t kill your tree as long as you do it the right way. But if you cut too much of the tree’s canopy or damage its root system, it can stress the tree to the point of death.

When To Prune Pine Trees

The best time to prune or trim pine trees is late winter or early spring, before they start growing again. This gives the tree time to heal before the growing season kicks in.

Avoid trimming in late summer or fall, because that can stimulate new growth that won’t survive the winter.

Can You Cut One Trunk of a River Birch? (What You Need to Know)

Ever looked at your river birch and wondered, “Can I just chop off one of these trunks?” 

Well, you’re not alone. River birches, with their cool peeling bark and multiple trunks, are awesome trees, but sometimes they can get a bit… crowded. Maybe one trunk’s growing too close to your house, or you just don’t like the look. 

Whatever the reason, you’re probably wondering if it’s okay to remove a trunk. 

In this post, we’ll explain if you can cut one trunk of a river birch tree. We’ll cover the dos, the don’ts, and all the stuff in between.

Can You Cut One Trunk of a River Birch?

Yes, you can cut one trunk of a river birch, But hold on a second before you grab that saw! It’s not something to do without thinking it through.

River birches are usually sold and planted with multiple trunks—normally three or more growing from the same base. Removing one of these trunks might affect the tree’s health, stability, and appearance.

Also Read: Can You Cut Off The Top Of A Holly Tree?

So before you go ahead, there are some things to consider:

Overall Tree Health

First things first, check out how healthy your tree is. A tree in good shape is going to handle losing a trunk better than a sickly one. 

Look for any signs that your tree isn’t doing so hot, like diseases, pests, or rotting parts. 

If your tree’s already struggling, cutting off a trunk could make things worse.

Structure And Balance Of Remaining Trunks

River birches naturally grow with multiple trunks, and that’s part of what makes them stable and unique-looking. 

If you take one trunk away, it might throw the whole tree off balance. 

Think about how the other trunks will hold up the tree’s canopy and if the tree’s going to look weird and lopsided after you’re done.

Proximity To Structures

If you’ve got a trunk that’s getting too close to your house or patio, you might need to remove it. 

But here’s the thing – the whole tree might have been planted too close to begin with.

In that case, you might want to think about taking out the entire tree and planting something else that fits better in that spot.

Also Check Out Our Midlothian Tree Trimming Service

Tree Age And Size

Younger river birches are usually better at bouncing back from trunk removal than older ones. 

The size of the trunk you want to remove matters too. Taking off a big, mature trunk is going to impact the tree a lot more than removing a smaller one.

How To Cut One Trunk Of A River Birch

Okay, so you’ve weighed all the factors and decided to go ahead with cutting a trunk.

First things first, timing is important. You’ll want to do this in late fall or winter. This way, you’re not stressing out the tree when it’s trying to grow, and you won’t lose as much sap

Also make sure you’ve got clean, sharp tools. This helps make clean cuts and reduces the chance of spreading diseases.

For smaller trunks, pruning shears or loppers will do the trick. If you’re dealing with a bigger trunk, you might need a pruning saw or chainsaw.

And don’t forget to gear up with gloves and eye protection!

Cutting Off One Trunk

When you’re ready to cut, get as close to the base of the trunk as you can, right above where it joins the other trunks. Cut at a slight angle so water runs off instead of pooling on the cut.

Also Read: Toughest Wood To Split

Don’t leave a stub sticking out – that’s like an open invitation for pests and diseases.

After you’ve made the cut, just leave it be. The tree knows how to heal itself.

Those wound sealants you might have heard about? They’re not recommended anymore because they can actually trap moisture and cause more problems.

Risks Of Cutting One River Birch Trunk

Birch Trees

Now, cutting off a trunk of a river birch tree isn’t risk-free.

Your tree might get stressed out, which could make it more likely to get sick or attract pests. 

It could also mess up its structural integrity which could potentially make it more likely to get damaged in storms. And of course, the tree’s going to look different, which might or might not be what you’re going for.

Alternatives To Cutting Off One Trunk

Before you decide to remove a trunk, consider some of the other options too.

Maybe you could just prune and shape the problematic trunk instead of taking the whole thing off. If you’ve got a trunk that’s leaning or unstable, you could get a tree expert to install cables or braces to support it.

Sometimes, it might be better to just remove the whole tree and plant a new one in a better spot.

Bottom Line

So, yeah, you can cut one trunk off a river birch, but it’s not a decision to make lightly. 

Take a good look at how healthy your tree is, think about the risks and how it’ll impact the tree, and consider other options before you do anything. 

If you do decide to remove a trunk, make sure you do it the right way and at the right time to minimize stress on the tree.

If you’re still not sure about what to do, talk to a certified arborist.

FAQs

Can You Cut One Trunk Of A River Birch By Hand?

Yes, you can cut one trunk of a river birch by hand. But it all depends on the size of the trunk. For smaller trunks, a sharp pruning saw or lopper might be enough. But for larger trunks, you need a chainsaw.

The 8 Toughest Wood To Split

Ever wonder what the toughest wood to split is? 

Maybe you’ve been out there with an ax, working up a sweat and getting nowhere. Or you’ve watched someone else struggle and thought, “What’s the big deal?”

Well, turns out some trees are just built to resist.

In this post, I’ll go over the eight toughest woods to split, and explain why they’re difficult and what makes them stand out.

#1 Elm

Wood Density Cutting Logs

Elm tops our list of the toughest wood to split.

Its wood fibers are like a tightly woven mat, making it a real challenge to get through. 

When you try to split elm, you’ll notice that it tends to absorb the impact, and your ax might just bounce right off! The fibers stretch and compress rather than separate.

Also Read: Can You Cut Off The Top Of A Holly Tree?

Fresh-cut elm is the most difficult. You need to let elm season for a good long while (at least an year) before you even think about splitting it. 

Some people might even wait until the bark starts falling off on its own.

If you’ve got access to a hydraulic splitter, that’s your best bet for elm. If you’re going old school with tools, try splitting on the coldest day you can stand to be outside. 

Despite all the trouble, elm burns hot and long, so it’s worth the effort if you can manage it.

#2 Sweet Gum

Sweet gum is another wood that’ll test your patience.

It’s got this interlocked grain that just doesn’t want to come apart. Instead of nice clean splits, you often end up with a stringy mess.

Another annoying thing about sweet gum is that it likes to grab onto your splitting tools. You might find yourself spending as much time trying to free your stuck ax as you do actually splitting.

On the bright side, sweet gum dries out pretty quickly compared to some other woods. It also smells nice when you burn it. 

But it doesn’t give off as much heat as some other hardwoods, so you’ll have to decide if it’s worth the trouble.

#3 Ironwood/Hornbeam

Ironwood, also known as hornbeam or musclewood, really lives up to its name. 

This wood is incredibly dense and hard, making it a real challenge to split, even for people who’ve been doing it for years.

It’s so dense that your splitting tools might just bounce off or get stuck. The grain of ironwood is often twisted or irregular, which makes it even harder.

Even though it’s a pain to split, ironwood makes excellent firewood once you get it processed. 

It burns really hot and for a long time, so people who can manage to split it really value it. It actually puts out about as much heat as hickory, which is considered one of the best firewoods.

If you want to split it by hand, you’ll want to use a heavy maul rather than an ax.

Also, check out our stump grinding and tree removal services.

#4 Sycamore

Sycamore trees are beautiful to look at, but when it comes to splitting them, they’re not so pretty. 

The main issue with sycamore is the way its wood grain grows. Instead of nice straight lines, the fibers interlock with each other, making it tough to get a clean split.

When you try to split sycamore, especially if it’s freshly cut, you might feel like you’re trying to chop a rubber tire. 

The wood tends to tear instead of split, leaving you with jagged, uneven pieces.

Sycamore is also known for being pretty wet when it’s first cut. All that extra moisture makes it even harder to split.

#5 Black Gum

Black gum, also called tupelo, is another wood that’ll give you a run for your money. Its interlocked grain makes it resist splitting, and tools often get stuck in it. 

Like sweet gum, it tends to tear instead of split cleanly, which can be pretty frustrating.

Fresh-cut black gum is especially tricky because it’s often full of moisture. 

This wetness, combined with its structure, can make splitting it by hand a real challenge.

Despite all the trouble it gives you while splitting, black gum does make pretty good firewood once you get it processed and properly dried. 

It burns at a moderate heat and lasts a decent amount of time. Some people even like the sweet smell it gives off when it’s burning.

#6 Cottonwood

Cottonwood might not be as hard as some other woods, but it’s still tough.

The biggest issue with cottonwood is that it’s stringy. When you try to split it, instead of breaking cleanly, it tears into long strips that don’t want to separate completely.

Cottonwood is also known for having lots of knots and irregular grain patterns, especially in the branches and upper parts of the tree. 

These quirks can make splitting even more of a challenge.

Plus, it doesn’t give off as much heat when burned, so you might wonder if it’s worth the effort. 

Cottonwood has a relatively low BTU (British Thermal Unit) rating compared to many other firewood types, meaning you need to burn more of it to produce the same amount of heat.

If you’re splitting it by hand, try to split the wood when it’s as fresh as possible. 

Oddly enough, it can actually get harder to split as it dries out and the fibers toughen up.

#7 Beech

Next up on our list is Beech.

When it’s freshly cut, it can be a real pain to split. The wood fibers are packed tightly together and your tools bounce off or get stuck.

Beech is also pretty dense, which adds to the challenge.

Just like the others, it gets easier to split as it dries out. If you let beech rounds sit for 6-12 months, you’ll often find the job much easier. 

As the wood dries, small cracks form that give you natural splitting points.

Once you get it split and seasoned, beech is great firewood. It burns hot and long, and it’s especially good for keeping your fire going overnight in a wood stove. 

It also doesn’t produce much smoke when it’s properly dried.

#8 Maple

Chopped Down Fire Wood In Forest

The last toughest wood to split on our list is maple.

I know I know, not all maple wood is tough to split, but some types can be a real pain to deal with, especially the ones with twisted grain. Like sugar maple, for example.

It’s really dense and often has this irregular grain that makes it super unpredictable to split. 

Now, if you’ve got straight-grained maple, it’s usually pretty easy to split. 

But if you come across pieces with knots, burls, or twisted grain, it’s a whole different story. These bits can make it really hard to split along the usual lines, and require a lot more effort.

Can You Cut Off The Top Of A Holly Tree? (Explained)

So, you’ve got this beautiful holly tree in your yard, and it’s been growing like crazy. Maybe it’s getting a bit too tall for your liking, or you’re worried it might start blocking your view. 

You might be thinking, “Hey, why don’t I just cut the top off and call it a day?” 

Well, you technically can cut off the top of a holly tree – but it’s not the best idea.

So before you go all Edward Scissorhands on your holly, take a minute and read this post. 

In this post, I’ll break down the consequences of cutting off the top (aka topping) a holly tree, and what you should do instead. 

Should You Cut Off The Top Of A Holly Tree?

Cutting off the top of a holly tree, or any tree for that matter, is not recommended.

This practice is called “topping” and it can cause a bunch of problems for your tree that will compromise its health, structure, and overall appearance.

Let me go over some of these in more detail:

Also Check Out Our Midlothian Tree Services!

Weak Growth And Suckers

When you chop off the top of your holly tree, you’re basically removing its main growing point.

The tree doesn’t like that very much, and it goes into panic mode and starts growing a ton of suckers or new shoots below where you cut.

They grow fast but the problem is they’re not very strong.

They’re usually thinner, weaker, and more spindly than the original growth. These would probably snap when the wind picks up or when snow and ice pile on during winter.

Plus, these suckers make your tree look messy and unkempt.

Unattractive Look

One of the reasons we love holly trees is their natural, pyramidal shape. 

It’s classic, it’s elegant, and it just looks right. 

But when you lop off the top, you’re essentially giving your tree a bowl cut. Remember those? Not a great look on people, and definitely not great on trees either.

What you end up with is a flat-topped or oddly bushy tree that looks out of place and unnatural.

It can make your whole yard look off and takes away from the holly’s natural beauty.

Top-Heavy Tree

This is a problem you might not see coming right away.

As your holly tries to recover from the topping with all those new branches, the upper part of the tree can get really dense – making the tree top heavy.

This extra weight up top puts a lot of stress on the lower branches and the trunk.

Over time, this can break branches or even make the whole tree more likely to topple over in strong winds.

More Prone To Pests And Diseases

Topping creates big wounds that can take forever to heal, if they even heal at all.

These open wounds are like rolling out the red carpet for pests and diseases to come on in and make themselves at home in your tree.

Topped holly trees are more likely to get infested or infected.

Fungi, bacteria, and wood-boring insects can all take advantage of these entry points, potentially leading to decay or disease that can spread throughout the tree.

In the long run, this can seriously shorten your holly tree’s lifespan.

Prune Instead!

Pruning Large Holly Tree Instead Of Topping

Now that we’ve covered all the reasons why topping isn’t great for your holly tree, you might be wondering, “Well, what am I supposed to do then?”

Do some proper pruning instead!

It’s a much kinder way to keep your tree in shape and looking good.

Plus, it’s better for the tree’s health in the long run.

If you do decide to prune your holly tree, the best time to do so is in late winter or early spring before new growth begins. 

How To Prune A Holly Tree

Now, let me show you how to prune a holly tree.

Don’t worry, it’s not as complicated as it might seem. Just follow these steps:

Step 1: Gather Your Tools 

First things first, you need the right tools for the job. 

For pruning a holly tree, you’ll want to get yourself a good pair of bypass pruners. These are great for smaller branches up to about half an inch in diameter. 

For bigger branches, you’ll need some loppers. 

And for those really thick branches (though hopefully, you won’t have too many of these to deal with), a pruning saw might come in handy. 

Make sure all your tools are sharp and clean. Dull tools can damage the tree, and dirty ones can spread disease.

Step 2: Plan Your Cuts

Before you start snipping away, take a good look at your holly tree. Walk around it, step back to see the whole shape. Try to identify any dead, damaged, or diseased branches. 

These are your priority and need to go first. 

Also, look for branches that are crossing or rubbing against each other, as well as any that are growing inward towards the center of the tree. 

Planning your cuts beforehand will help you avoid over-pruning and ensure you maintain a nice, balanced shape.

Step 3: Remove Problem Branches 

Now it’s time to get to work. 

Start by removing those dead, damaged, or diseased branches you identified. 

Cut them back to the nearest healthy branch junction or to the trunk, making sure to make clean cuts at a slight angle. 

This helps water run off the cut surface and promotes faster healing. 

Remember, when cutting back to a branch, don’t leave a stub, but also don’t cut flush with the trunk – aim for the slight swelling where the branch meets the trunk, called the branch collar.

BTW, did you know that we offer tree trimming and tree removal services?

Step 4: Thin Out The Interior 

Next, focus on opening up the center of the tree.

Remove one of each pair of crossing branches, choosing to keep the one that best maintains the tree’s natural shape. 

Also, take out any branches growing towards the center of the tree. 

This improves air circulation and allows more light to reach the interior of the tree, which can help prevent disease and promote overall health.

Step 5: Shape The Exterior

If you’re going for a more formal look, now’s the time to shape the outer branches. 

Make cuts just above a leaf or bud, angling your cut slightly. 

Remember to keep the bottom of the tree slightly wider than the top – this allows sunlight to reach all parts of the tree and prevents the lower branches from dying off.

Step 6: Step Back And Assess 

Take a break and step back to look at your work. Does the tree look balanced? Are there any areas that still look too dense or any awkward branches sticking out? 

Make any final adjustments to achieve an overall pleasing shape. 

Remember, you can always prune more later, but you can’t put branches back once they’re cut!

Bottom Line

Low Image Tree In Front Yard

You cut off the top of a holly tree, but it’s never a good idea. Instead, prune the holly tree.

Pruning might seem like more work upfront, but trust me, your tree (and your future self) will thank you for it.

That said, always keep in mind the golden rule of pruning – never remove more than one-third of the tree in a single pruning session.